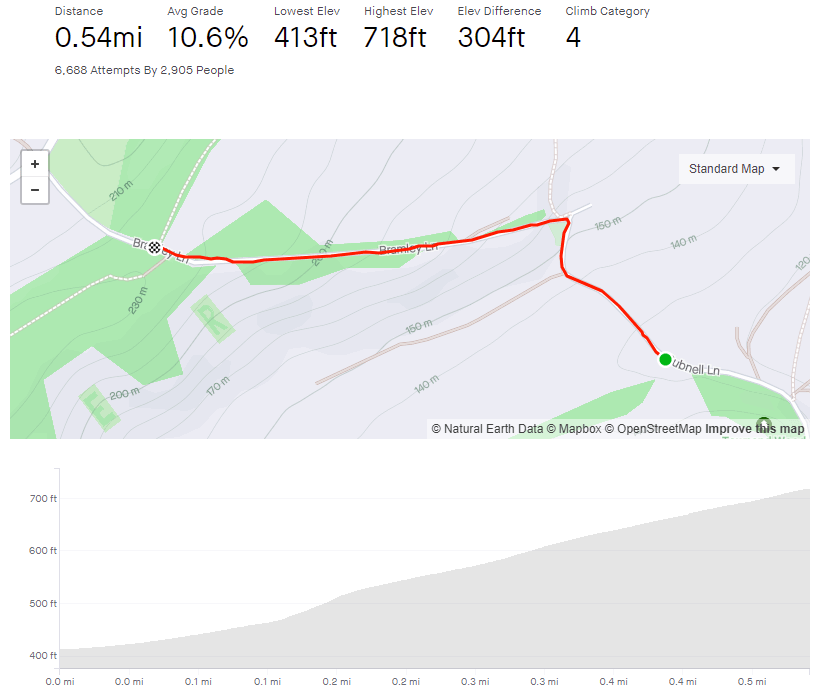
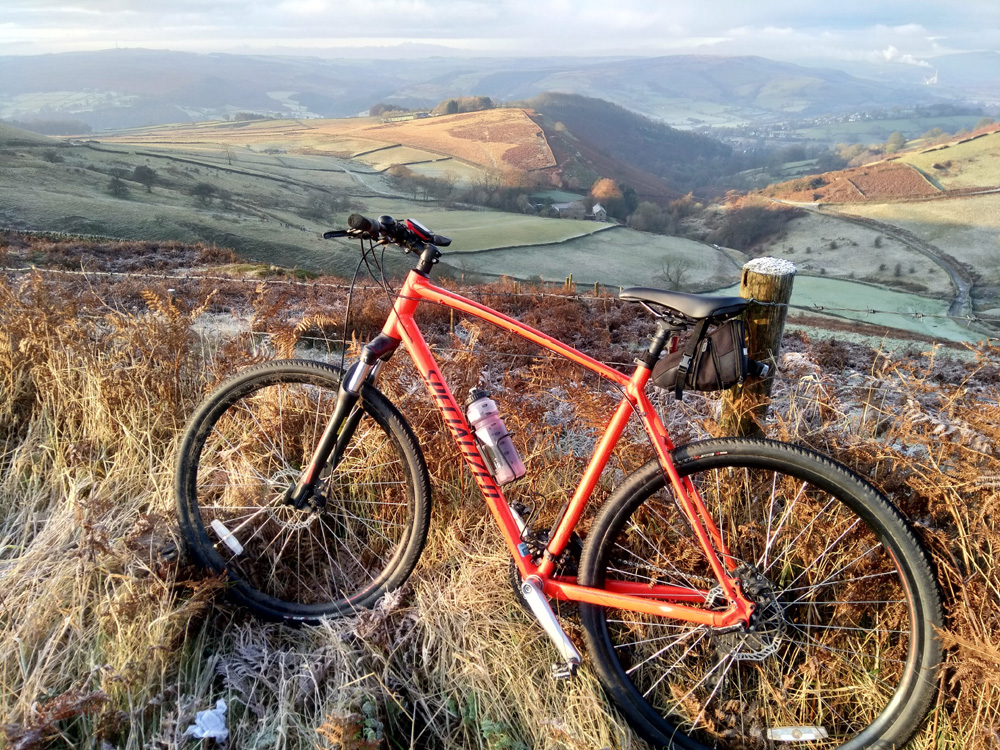
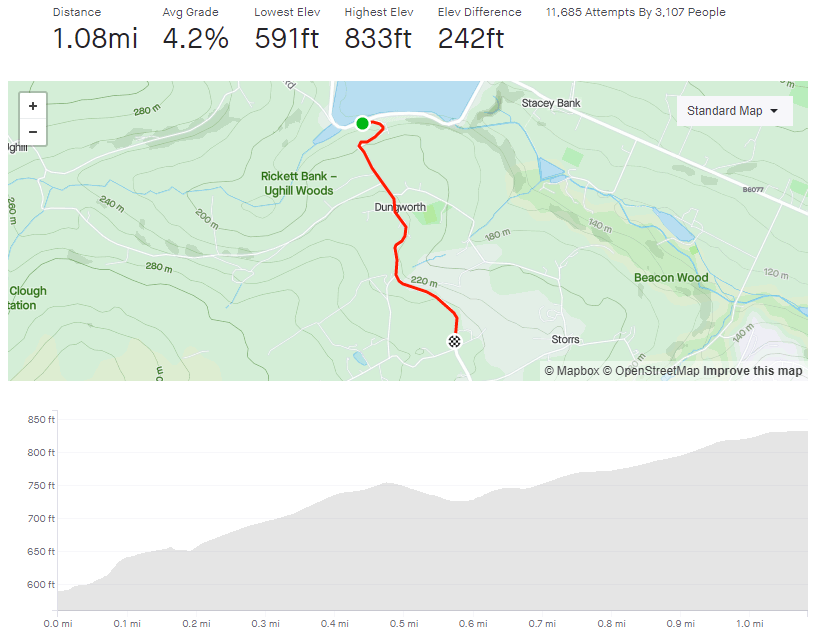
Category: country

The Thunderpit

  • The Thunderpit
  • Length: 0.39 miles
  • Avg gradient: 12.5%
  • Peak gradient: 19.5%
  • Difficulty: 3/5
  • Likelihood of encountering unpleasant motor-vehicles: 1/5
  • Elevation gain: 258ft
  • Strava

A quiet lane with a surprise at the top.

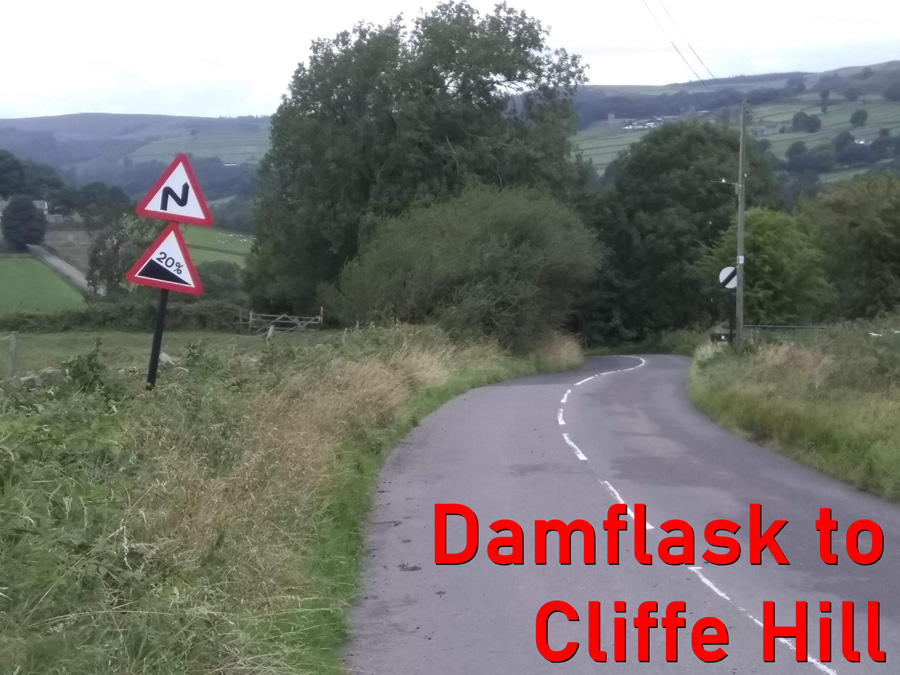
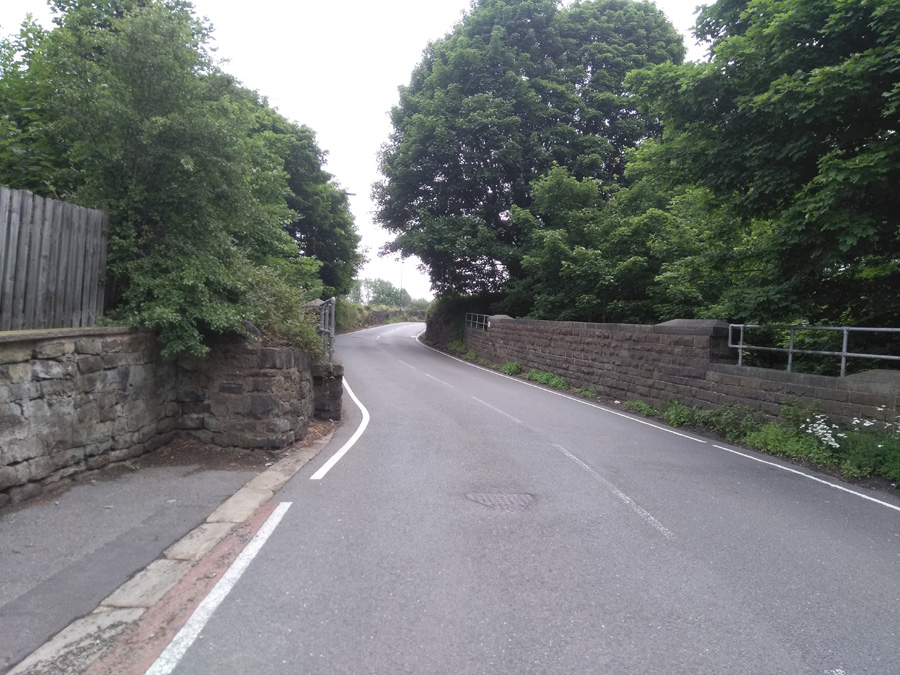
Full disclosure: the road is actually called Farnsley Lane but at the top you reach the far more dramatic sounding Thunderpit Lane. Also, credit to The Digital Cyclist, whose website led me to this hill.

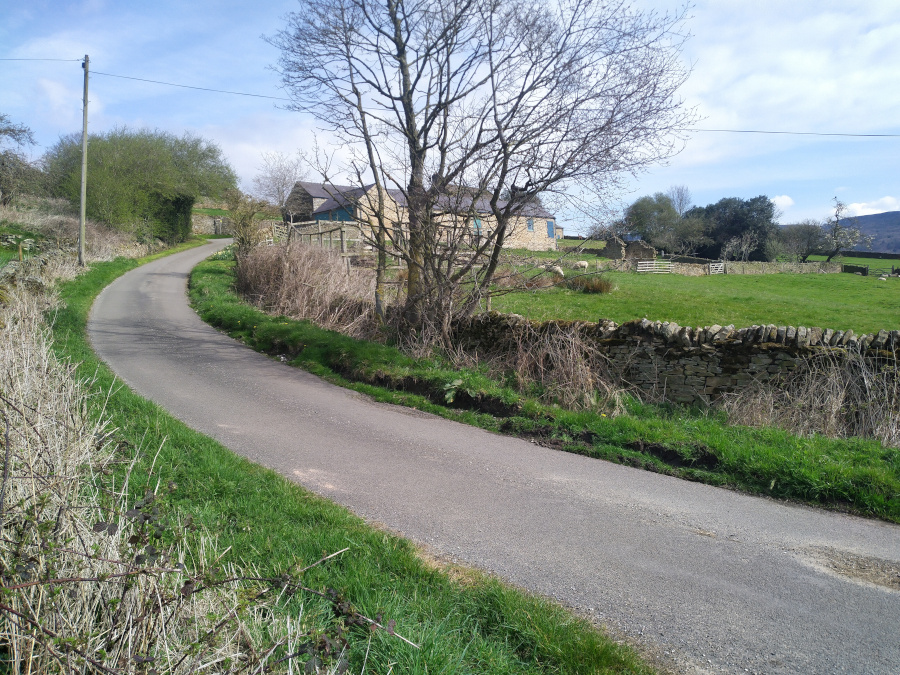
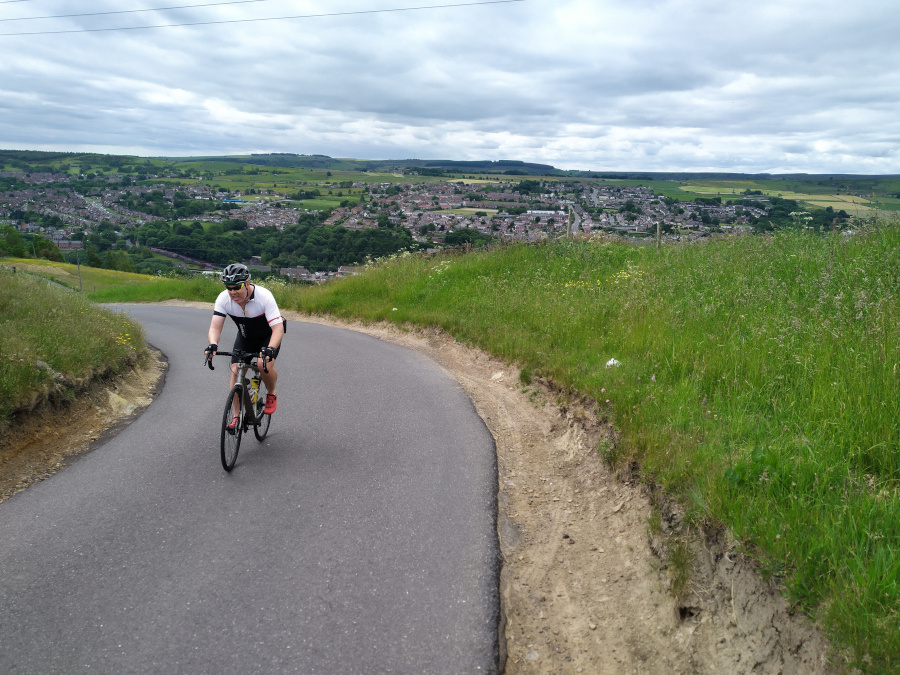
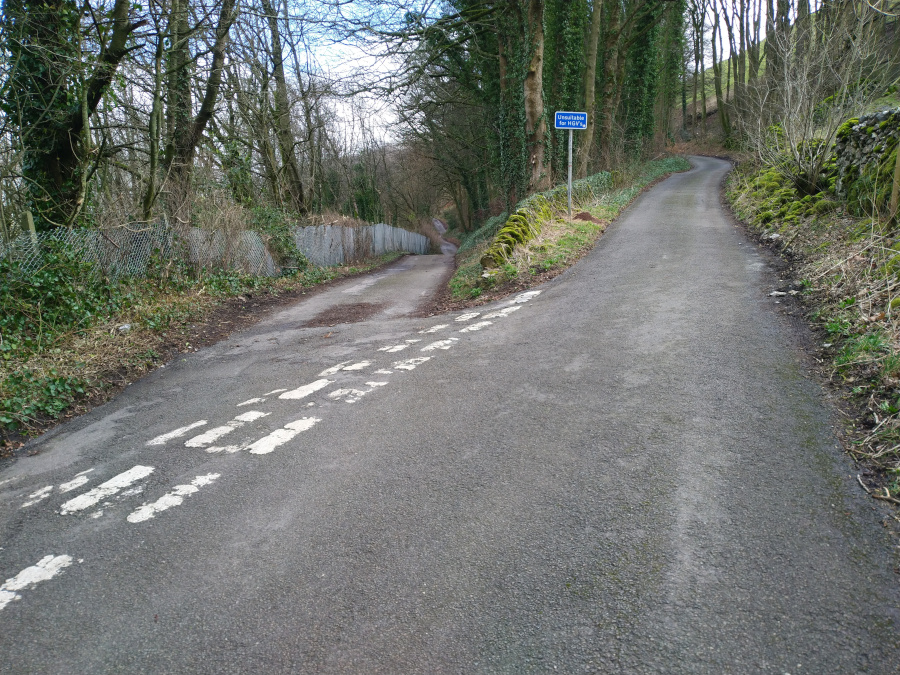
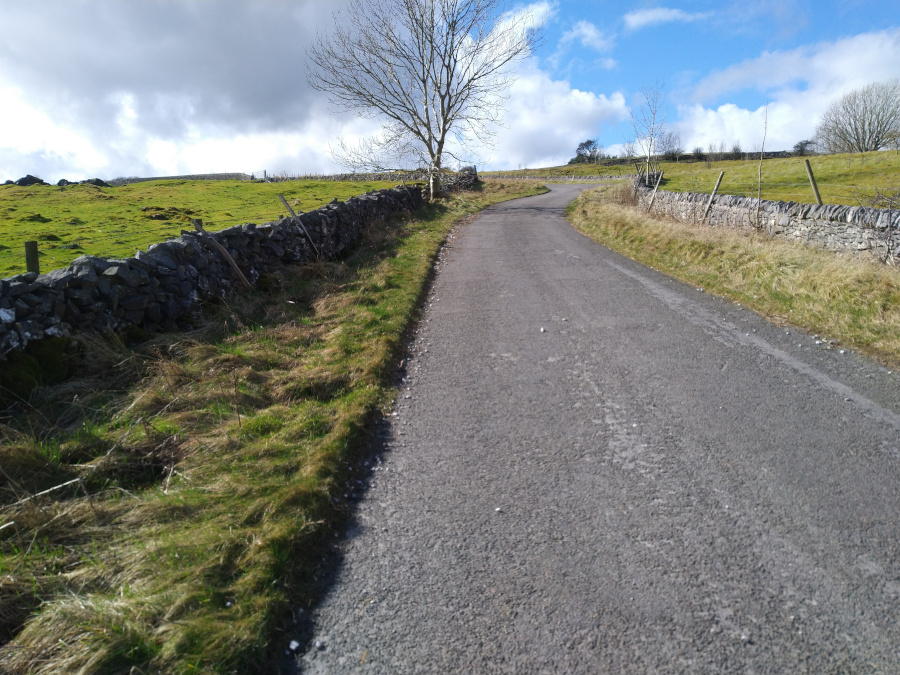
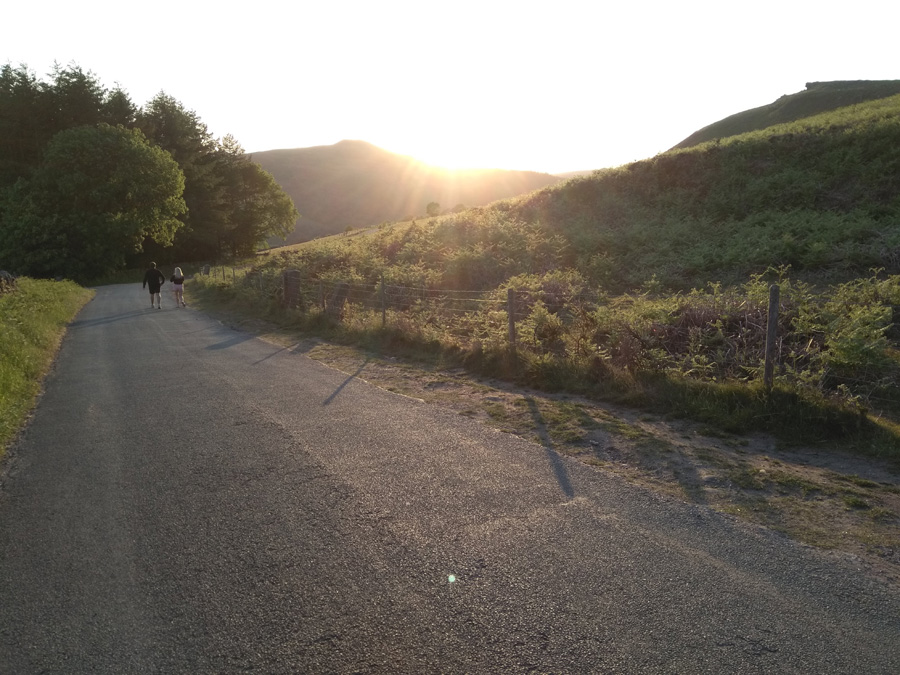
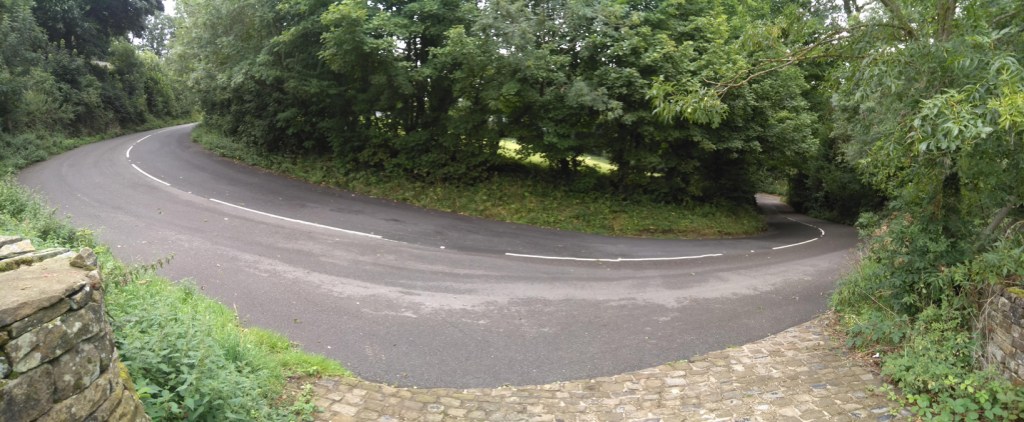
Keep you eyes peeled for the entrance to Farnsley Lane as it’s a blink and you’ll miss it turning but it will feel like a blessing after cycling along the horrible A623. No rest for the wicked though as you’re immediately into double figures, that steadily grow, as the road bends to right and you’re faced with a steady, slightly-wiggly, straight (is that an oxymoron?) up the hill.

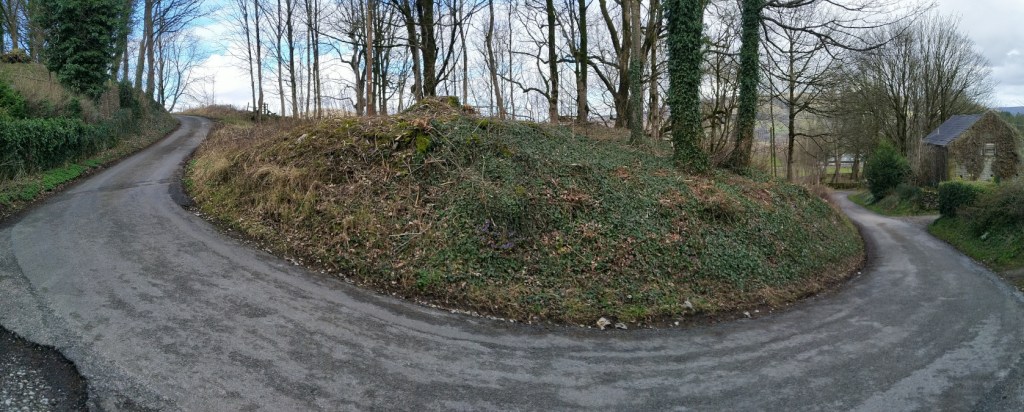
The bend is the steepest section of the road, adding to the challenge of the slightly poor surface that is probably also covered in debris. The consolation you can take from the amount of detritus on the road is that it does suggest that motor vehicles are a rare sight up here.

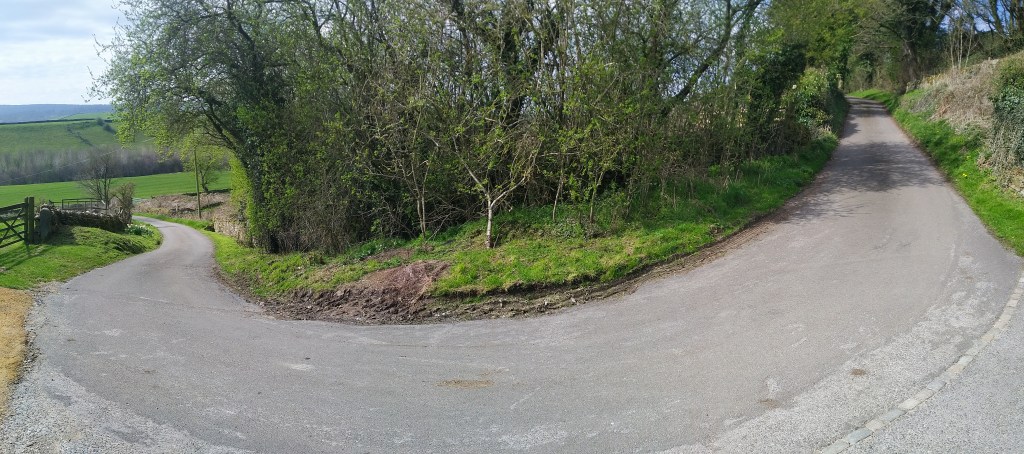
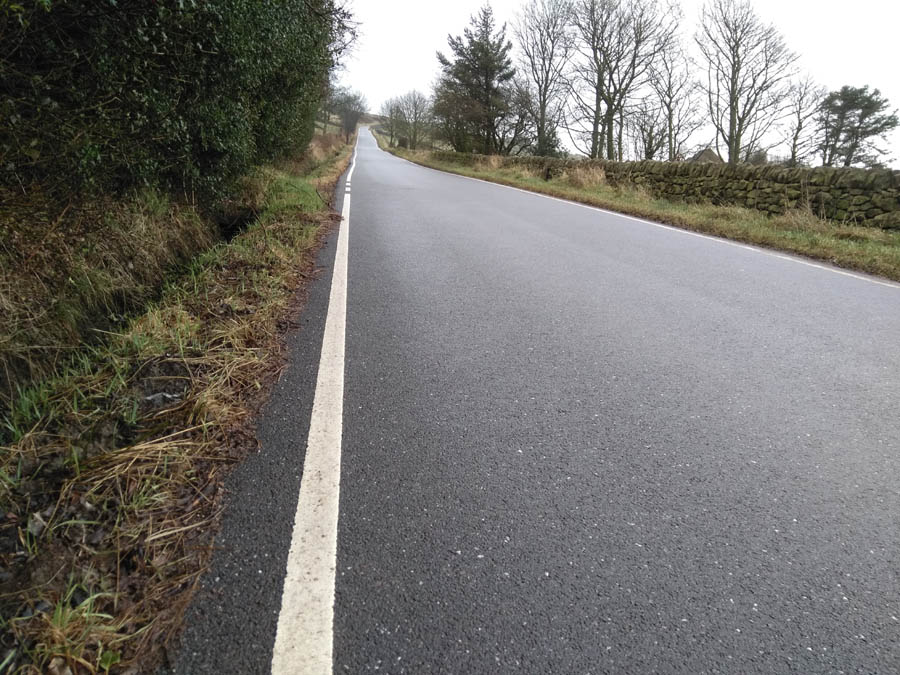
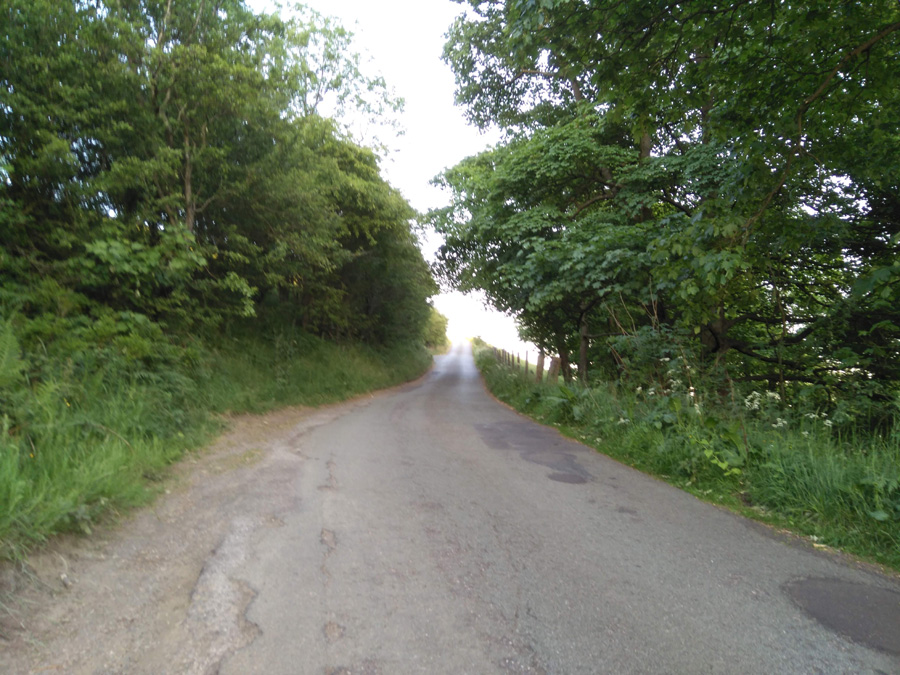
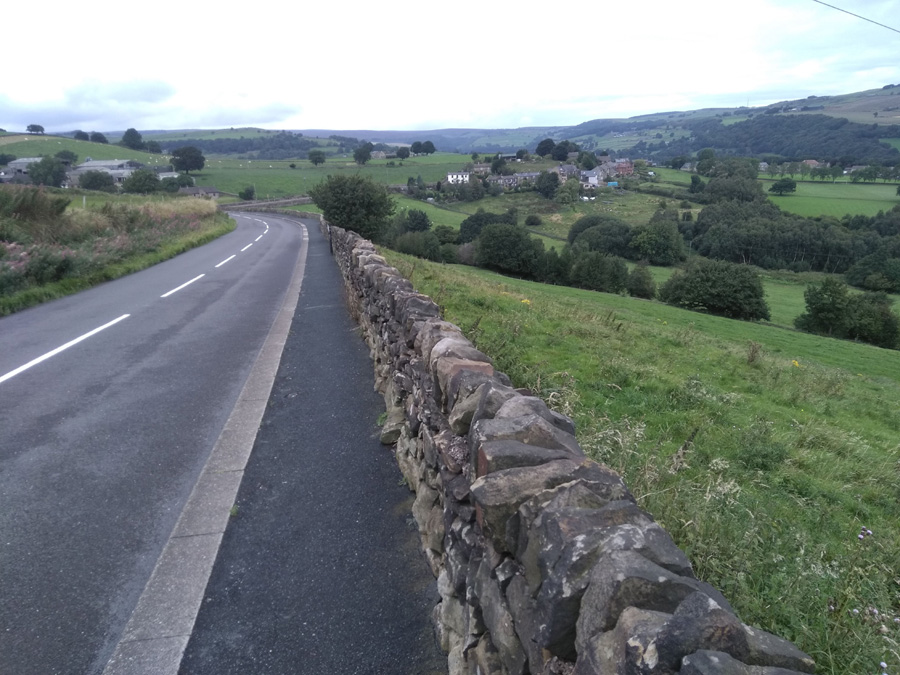
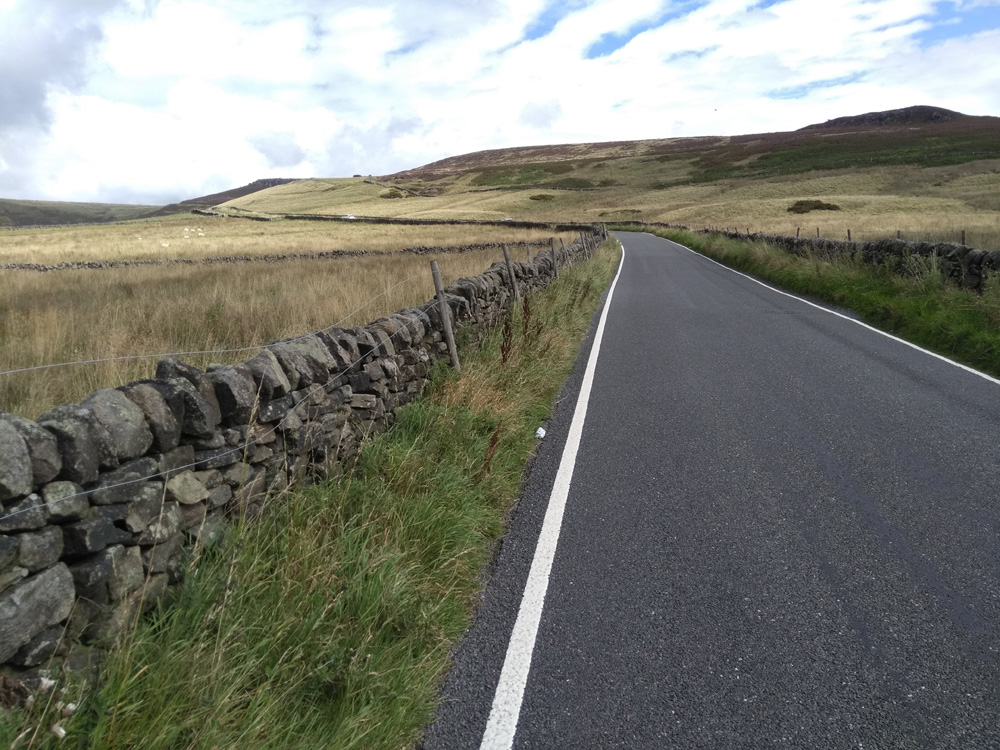
There is not much to see as you’re enclosed by trees on either side but you should feel the gradient drop off slightly as you progress upwards, dropping to single figures as the road gently bends left.

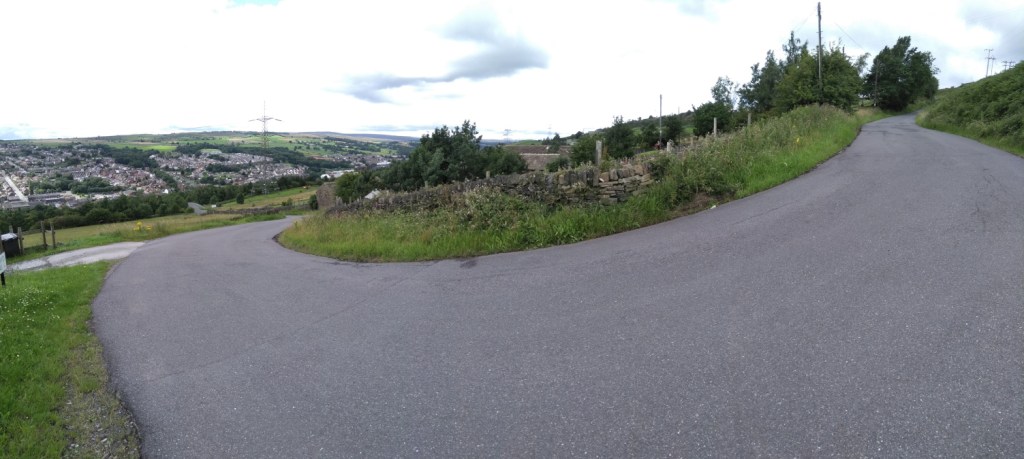
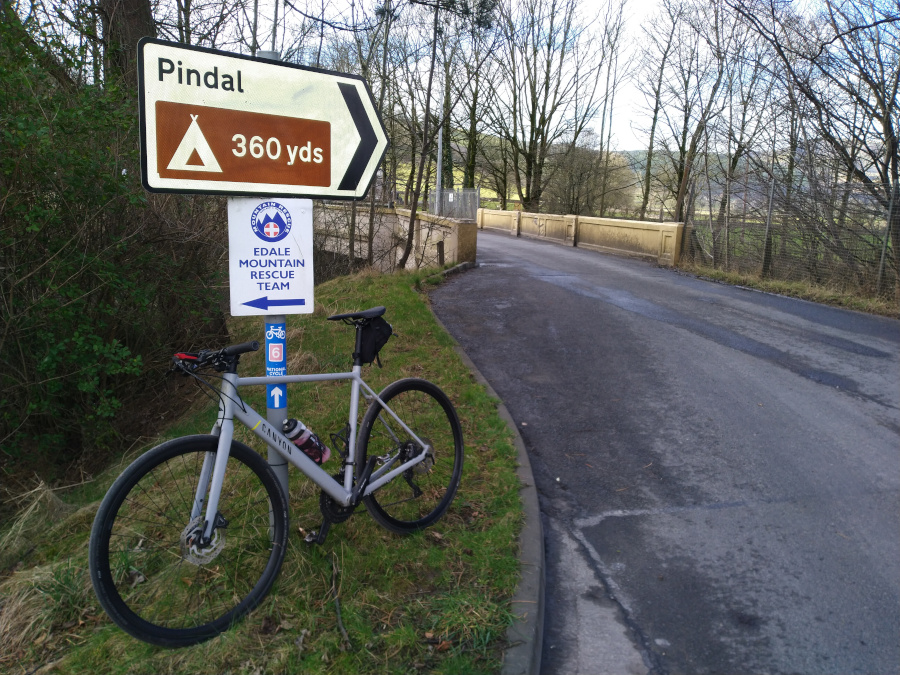
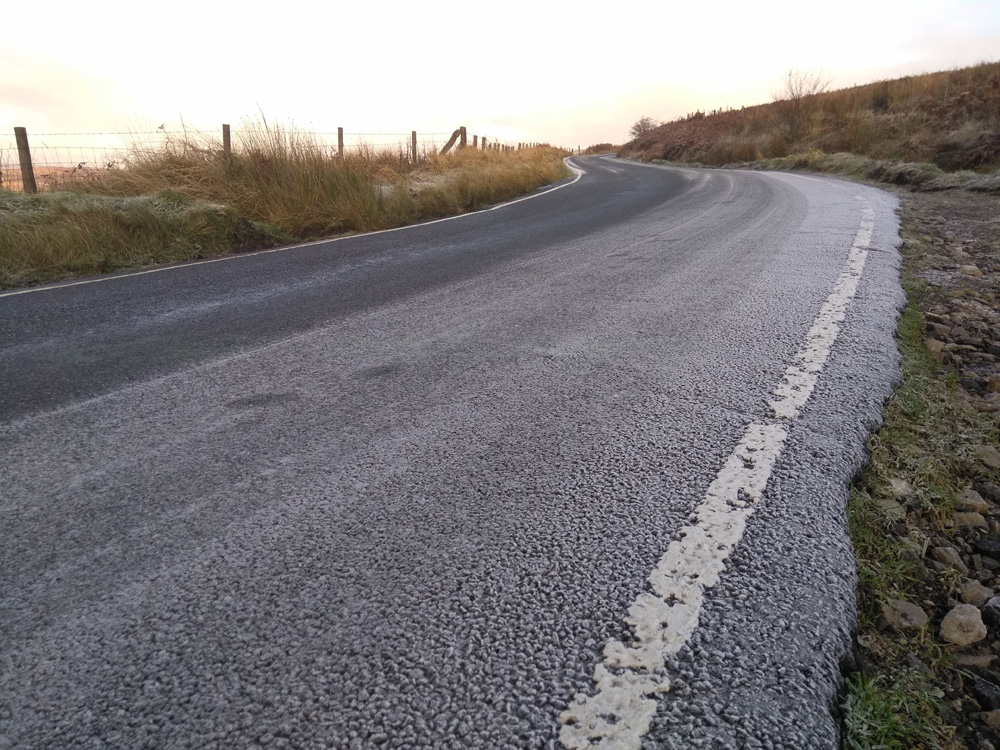
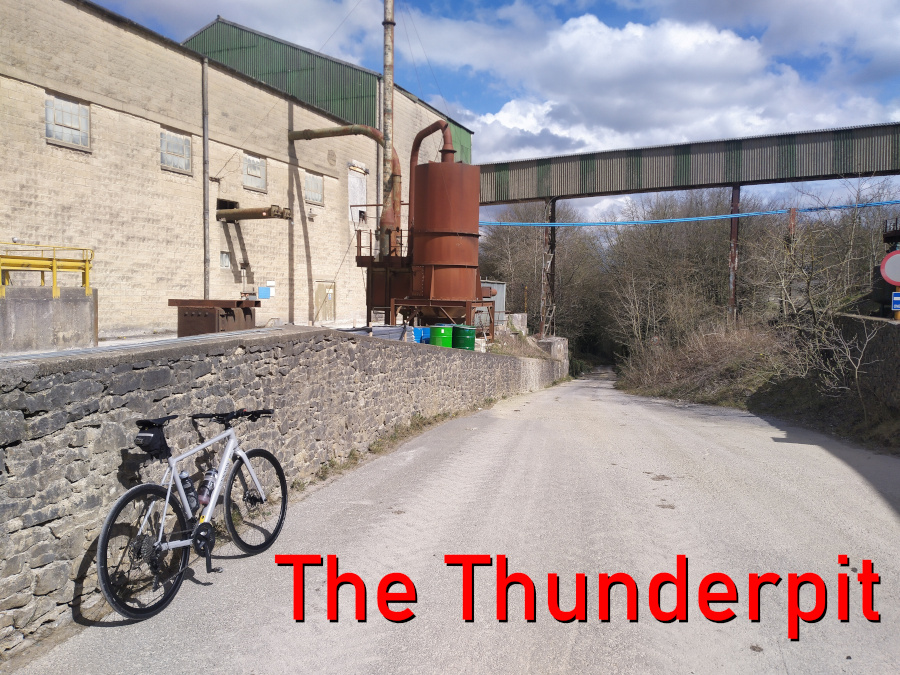
The final 150m of the hill holds a steady 7.5% and, once you crest the hill, you’ll find yourself in the unexpected surroundings of the British Flurospar industrial mine. Don’t worry, it’s a public road so, despite feeling like a trespasser, you’re not breaking any rules cycling through here.

Please note, I’ve only ever been here on a Sunday when it was dead quiet. I suppose there is a real possibility that it might be quite busy with industrial machinery and lorries on a weekday.

Enjoy this? ❤ Support the site!

Bubnell Lane

  • Bubnell Lane
  • Length: 0.54 miles
  • Avg gradient: 10.6%
  • Peak gradient: 17.7%
  • Difficulty: 3/5
  • Likelihood of encountering unpleasant motor-vehicles: 1/5
  • Elevation gain: 272ft
  • Strava

Quiet and picturesque.

Turning off the main road though Baslow, you join Bubnell Lane after crossing the river, and before you reach the beginning of this picturesque climb, you’re gifted a pleasant totter alongside the Derwent. Not long after the river meanders away from the road, you’ll reach the start of the climb, marked by a gate on your left and, up the hill, a farmhouse and stables.

Within the first 0.1 mile, you’re hitting around 8% but you will feel the extra 2% as you ride around the bend in the road. You’ll shortly reach the stables and the switchback: at 17.7%, the steepest section of the climb. It’s a quiet road, so fairly safe to go wide and take a shallower line.

From here, it’s a steady, straight plod to the top, graced by trees on your right and a lovely Derbyshire vista on your left. The gradient fluctuates around 10%, so it’s never too challenging, it just seems long because the top is hidden just around that corner you can see in the distance.

Once you make it round the corner, the top is marked by a footpath post, followed by a speedy descent to Hassop Road and down to Calver.

Pea Royd Lane

  • Pea Royd Lane
  • Length: 0.72 miles
  • Avg gradient: 12.5%
  • Peak gradient: 17.1%
  • Difficulty: 4/5
  • Likelihood of encountering unpleasant motor-vehicles: 1/5
  • Elevation gain: 476ft
  • Strava

Is it really only 0.72 miles?

Pea Royd Lane is a fairly well known road, having been used for many hill climb races including the National Championships, so I’m sure there are far more authoritative and informative descriptions of this notorious cycle elsewhere on the internet but, since you’re here, make yourself comfortable.

This climb begins before you even get to the start of Pea Royd Lane, requiring you to cycle for 0.2 miles up Hunshelf Road, at a not insignificant 7.7% average. Once you’re past the factories and the view begins to open out over Stocksbridge, you’ll see Croft House on your left and a switchback on your right: the beginning of Pea Royd Lane proper.

In Simon Warren’s 100 Greatest Cycling Climbs he says ‘the surface is terrible and gets worse’ but I think the road must have been resurfaced since then as it’s not too bad now, not that that makes the road any less steep. This section, up to the bridge, involves some of the steepest climbing, with the incline hovering around the upper teens, briefly breaking 20%.

You’re given a short relent crossing the bridge but the hill is soon back to 15-16% on the approach to the next switchback. Take the bend as wide as you can (it is a quiet road but it’s not devoid of all traffic) and grab a look over your shoulder to appreciate how high you have come out of Stocksbridge. You’re now climbing at around 13-14% for 100 metres or so but this is the part I always find hardest as the end is still hiding from view.

The road shallows slightly as you pass a farm before picking right back up as you finally approach the apex, signified by black rocks jutting out of the hillside and which is hiding just around the corner.

Surely it was longer than 0.72 miles, right?

Pindale

  • Pindale
  • Length: 2.45 miles
  • Avg gradient: 5.9% (although it’s 10.5% if you start at the switchback)
  • Peak gradient: 17.5%
  • Difficulty: 4/5
  • Likelihood of encountering unpleasant motor-vehicles: 1/5
  • Elevation gain: 772ft
  • Strava

Hard as cement.

As you travel around the Hope Valley you can’t escape the extraordinarily ugly cement works that sit, like a festering scar, bang in the middle of the valley. How they ever got beyond planning permission, is a mystery. However, there is a lively, little known climb that snakes around the works’ back that makes it worth venturing over there.

Most of the segments around here commence in Castleton but it seems more appropriate somehow to start at the entrance to the cement works themselves. It’s a very gentle start as you leave the industrial monstrosity behind, along a singletrack road with a beautiful view of the Hope Valley and past a campsite. The gradient is creeping up from 5% to about 10% as you take the first sweeping bend to the right and the road surface starts to worsen.

Around the corner and you’re into low-medium double figures as the climb begins and the valley opens up below you. After about 300 metres of climb, however, the road drops away into a speedy descent but take care as the surface is awful and also probably covered in detritus.

When you reach the junction, take the sharp left up the hill, through the tree-tunnel, where the climb really begins. It’s pretty much straight into a 20% incline for about 300 metres before a short level-off as the road bends left. Recharge and prepare for the jewel in this climb: the sweeping bend as the trees drop away and the expansive vista of the Hope Valley opens below you, right in the middle of which is the pig-ugly, brutalist cement works. I’ve got different readings but I think the incline around the corner is about 15% but totally worth it. As you switchback, take a moment to enjoy the sight of Mam Tor and Loose Hill in the distance, but don’t forget that you’re far from done with the climb.

As the gradient drops to a more manageable 5% it may look like you’re approaching the top, but it’s just the first of a couple of false summits before the end. There’s a slight increase in steepness as you wiggle up the road, but nothing that feels insurmountable and it is now more of a psychological battle, as, having tackled the hardest section, the pesky hill just keeps going at 8%, with no end in sight.

It continues in this vain for about 3/4 of a mile, across exposed exposed moorland, skirting the top of the cement works quarry, before, finally, finally, you reach the top, marked by a drystone wall line and what was presumably, once a gate.

Woodfall Lane & Côte de Bradfield

  • Woodfall Lane & Côte de Bradfield
  • Length: 1.71 miles
  • Avg gradient: 10.1%
  • Peak gradient: 23%
  • Difficulty: 4/5
  • Likelihood of encountering unpleasant motor-vehicles: 2/5
  • Elevation gain: 633ft
  • Strava

The Tour de France section is the easy bit.

If you want to get from Low Bradfield to High Bradfield, unsurprisingly, it’s going to involve some climbing. The second half of this climb was one of the final climbs in Stage 2 of the 2014 Tour de France but, you’ll be glad to hear, the first section is much harder.

You begin in earnest in the quintessentially English village of Low Bradfield, with the cricket pitch behind you and the Post Office to your right (is that Mrs Goggins serving in there?). The start of the climb isn’t too foreboding at a steady 7% as it begins the ascent past houses and farm buildings towards the trees.

As you pass Smallfield Lane, you’ll notice a gradient increase into double figures, hitting the low 20s as the road wiggles under tree cover, soon hitting one of the most challenging bits of the climb. Photos of this section never capture how steep it really is. As you make it up a mild S-bend there is a bench to aim for (I had a sit down here the first time I attempted this hill) that I use as a mental marker for the climb easing off slightly (but only by about 5%). It’s relatively safe to zig-zag across the road here, if it helps, as most descending traffic is taking it cautiously and most ascending traffic is having as much difficultly getting up as you.

Once you’re around the right hand bend, you’ve got the (relative) ease of a section of 10-14%, so ease the pressure off the legs a bit before tackling the steep approach to the Old Horns Inn. There is a Strava segment saying that this bit is 31%, which I think is wrong but worth baring in mind for showing off to people who aren’t familiar with the road.

I think it is perfectly acceptable to take a couple of turns around the pub car park to get your breath back and legitimately claim that you didn’t stop on the climb before you tackle the ‘Côte de Bradfield’.  Make sure Loxley Road is clear before crossing over on to Kirk Edge Road, where there’s a sign with some key stats, signifying the start of the Tour de France section. Although you have conquered the worst of this climb, the first blind bend in this section is a killer, just touching 20%, but feels harder as you need to stay on the inside to avoid any traffic coming the other way.

The landscape opens up here, with farmland stretching in all directions and you appreciate the 400 feet that you’ve already climbed. The remainder of the road is a steady, fairly straight climb, fluctuating around 10% (you might notice the occasional bit of faded Tour graffiti a la ‘Va Va Froome’ along the way) but feels harder because of what you’ve already achieved. Strava says the very end is only 13% but I’m sure it spikes closer to 20%. The first couple of times I did this hill, a sneaky little tailwind appeared just in time to push me to the summit. I hope you’re as fortunate as I was.

The reward for your efforts is one of the most fun, fast descents in the area. At almost 2 miles before you meet a junction, although slightly bumpy in places, riding down Kirk Edge Road makes the climb up Woodfall Lane and and the Côte de Bradfield worth the suffering.

New Road

  • New Road
  • Length: 1.57 miles
  • Avg gradient: 5.1%   Peak gradient: 10.5%
  • Difficulty: 3/5
  • Likelihood of encountering unpleasant motor-vehicles: 2/5
  • Elevation gain: 419ft
  • Strava

A beautiful Derbyshire climb.

If you’ve been out in the Hope Valley, but don’t fancy tackling Fiddler’s Elbow, Surprise View or The Dale on your return to Sheffield, the best option to get up over that big hill between you and the city is probably New Road, near Bamford.

Just south of Ladybower Reservoir you’ll find this rather picturesque climb that is never too hard but also never easy. As you turn off Ashopton Road, you’re straight into a 9% climb, so it’s heads down from the off. The gradient fluctuates between 5 – 10% for the next mile or so as you ascend the tree lined road. On your left, you’re presented with the imposing sight of Bamford Moor and, on your right, the view across the valley towards Thornhill and Shatton, the vista improving steadily as you make your way up New Road.

It’s a fairly straight line, with the biggest hazard being gangs of walkers or motorists descending a bit too quickly but it’s usually a relatively quiet ascent. One of the highlights happens around the 0.7 mile mark when, suddenly, the trees on your right drop away to reveal a most spectacular panorama across the valley. In the distance you might spy Shatton Mast, sitting atop Shatton Moor, the climb up to which I’d rate as a 5/5 (but we’ll save that for a later date).

The gradient sits around 5% here, so keep enjoying the view until you meet another line of trees and the road bends round to the left at what feels like its steepest section. You’ll shortly reach a summit, where there will likely be a few cars parked by local hikers, but you’re not at the end of the climb yet. The hill drops away into a fun and welcome descent but do take care, especially on the sharp right-hand bend which descends at -9%.


Try to keep your momentum here, as the gradient returns to almost 10% (but can feel greater), and you’ll soon reach the apex, where you’re greeted with a bench to sit on and one of the most beautiful views in the area.

Damflask to Cliffe Hill

  • Damflask to Cliffe Hill
  • Length: 1.08 miles
  • Avg gradient: 4.2%   Peak gradient: 25%
  • Difficulty: 3/5
  • Likelihood of encountering unpleasant motor-vehicles: 2/5
  • Elevation gain: 242ft
  • Strava

From the reservoir to the ice cream.

Don’t be lulled into a false sense of security when looking at the average gradient, this climb includes a chunk of descent and, at the very start, a couple of torturous turns.

Begin at the south side of Damflask Reservoir, a body of water surrounded by numerous challenging cycle climbs. You could probably make a nice day trip to do them all in one go. The one we’re focusing on though probably has the hardest opening. Turning sharply on to Briers House Lane, the approach to the first switchback quickly reaches 9% before ramping up to 25% at the corner’s apex.

That’s the steepest bit of the climb over with quickly but you’ve still got about a mile to go before you reach Our Cow Molly and that ice cream you’ve been promised. It’s a similar distance to the next switchback but, this time, hovering around the 5% mark, so not so steep. Take glance to the right, looking out over the reservoir, to appreciate how high you have already climbed.

Strava says that the corner is only 12%, but it also says there is a little descent beforehand, so I think there must have been some GPS errors when this segment was made because there certainly isn’t a drop and I can’t believe that the second corner is any shallower than the first, especially as you need to be on the inside of this one.

The good news is that it’s a much gentler climb from here on. The straight section ahead fluctuates between 5-9%, and it was here, at the large stone marking the entrance to the hamlet of Dungworth, that I was originally going to end the climb entry but the hill does continue to ascend. So, carry onwards through the village and, as the road wiggles slightly, you’ll see an old phonebox (which now contains a defibrillator, I think) that marks the short descent before the final climb.

Stay on as the road bends around to the left and the view of the valley below really opens up. It’s a gentle climb, mostly staying in the low single figures, before you finally arrive in a place called, appropriately enough, ‘Hill Top’ and Our Cow Molly, with that ice cream you’ve been looking forward to.

Burnt Hill Lane

  • Burnt Hill Lane
  • Length: 1.26 miles
  • Avg gradient: 8.7%   Peak gradient: 14.7%
  • Difficulty: 3/5
  • Likelihood of encountering unpleasant motor-vehicles: 3/5
  • Elevation gain: 583ft
  • Strava

Jawbone Hill’s evil twin.

Starting from almost the same spot as Jawbone Hill, Burnt Hill Lane heads in the opposite direction and gives you a harder time than its more celebrated sibling.

You begin at the telephone box on Church Street, at one of Sheffield’s most dangerous junctions for cyclists (so take care on your way down)! Luckily you’re heading uphill and excess speed and momentum are not going to be troubling you much. You’re straight into it, as you head away from Oughtibridge, with a gradient fluctuating between 5 and 10%. The inconsistent gradient is a feature that Burnt Hill Lane retains for the entire climb.

Once you’ve passed the two churches the road mellows out for short period but, since there’s usually cars double parked all the way, the bigger challenge is going to be avoiding oncoming traffic or irate drivers behind you. I’ve been known to take a brief detour onto the pavement to allow cars to pass and if you do the same, since you’re going so slowly, you’ll not present a danger to any pedestrians.

The road bends to the left and the gradient picks up into double figures again, shortly passing the entrance to the excellent Wheel Lane on your right. The climb ramps up again as you pass Haggstones Road, holding around the 10% mark, and it’s here that you begin to cross into the countryside. Pedal on as the road begins to get more rural, much narrower and eventually surrounded on either side by fields. As you pass the third church of the climb, you hit the steepest 14.7% section: a blind and sharp 90° turn. Cross your fingers nothing is coming downhill!

The road eases off for about 300 metres, giving you a chance to appreciate the view, before ramping up to around 14% again, at the junction with Old Lane, a little track leading to a farm. There’s a bit of a false summit ahead but once you crown that, it’s single figures until you reach Coal Pit Lane and the end of the segment. You can either take Coal Pit Lane or continue straight on, both roads lead you to Kirk Edge Road and a couple of lovely descents.

It’s not as famous as the Cote de Oughtibridge and it’s harder but the pay off at the top is worth it. Just be careful descending, it can be quite hairy in places!

Jawbone Hill / Cote De Oughtibridge

  • Jawbone Hill / Cote De Oughtibridge
  • Length: 1.06 miles
  • Avg gradient: 8%   Peak gradient: 13%
  • Difficulty: 3/5
  • Likelihood of encountering unpleasant motor-vehicles: 4/5
  • Elevation gain: 462ft
  • Strava

Described as possibly ‘the most decisive climb of the Tour De France’s visit to Yorkshire,’ The Cote De Oughtibridge (or Jawbone Hill to its friends) is a slog of a climb with a few false summits along the way.

The Strava segment starts at Grand Depart sign but it’s actually a short distance before the incline begins. Similarly, the segment ends at the Birley Stone, despite there being a few more feet to climb after that point.

With the park on your left, the start doesn’t look too foreboding, at around 6%, but by the time you’re passing The Pheasant pub, the hill has already sneaked into double figures at 11%. A short way on from this you’ll find that the road narrows as you cross over a railway line. Plod on and hope that you’re not be being followed by an impatient motorist unable to overtake you.

After the wiggle of the railway bridge, you’re onto the steepest 13% segment of the climb, which it roughly maintains until you reach Greenhead House Farm and The Little Sausage Shop. Rumour has it that somewhere on Jawbone Hill is a ‘Scotch Egg Shop’ but I suspect that, in reality, it’s this sausage shop they’re thinking of. Along here, on your left, you will spy the first of two reminders of the Tour De France’s visit: a yellow painted bike fixed to a metal ‘Shimrod’ sign, and shortly afterwards, opposite the farm, a battered old bike tied up in a tree.

Once you’re past the sausage shop, the gradient drops to a more palatable 5.5% but don’t be fooled, this is just the first false summit! The climb continues, slipping back up to 9.5% as the road bends to the right. You are well into the countryside now and while the steepness does relent a little, the hill is just playing with you. It’s got one last stinker in store.

The road begins another right-hand bend and, as you pass the Grenoside sign, you feel that must be the apex…but not quite! Although it’s apparently only 6.5%, the final 150 yards up to the Birley Stone always feels much harder than it should.

The end of the segment might not be the absolute top of the hill but it’s a great place to stop and take in the view over Sheffield. It’s also a great place to turn around and speed right back down to Oughtibridge.

Fiddler’s Elbow

  • Fiddler’s Elbow
  • Length: 1.62 miles
  • Avg gradient: 7%   Peak gradient: 9.7%
  • Difficulty: 4/5
  • Likelihood of encountering unpleasant motor-vehicles: 2/5
  • Elevation gain: 562ft
  • Strava

A never too demanding climb with some lovely views, Fiddler’s Elbow is probably your best option to get from Hathersage to Sheffield. It’s easier than The Dale, has far fewer motorists than Surprise View, and remains a satisfying challenge.

Although the 1.62 mile climb officially begins at the turning for Ringinglow, off the A6167 out of Hathersage, if you’re coming from that direction, you have to ride up a mile of at what seems far tougher than the 5% that my calculator says it is. It’s probably because it’s such a busy road that it feels harder than it really is. Whatever the reason, when you see the turning for Ringinglow it comes as a bit of relief. Short lived relief before the real climb begins, admittedly, but relief none the less.

As you leave the busy road behind and pass the farmhouse on your right you are straight into this one. Strava reckons this is 15% but that’s not right, Veloviewer gives it a much more plausible 8%, which sets the tone for the rest of the climb. Shortly the trees on your right give way to the moors, the view opens out, and in the distance you can see the rocky outcrop of Callow Bank, which gives you a rough target to aim for.

The road continues in a fairly straight line, meeting a slight curve at the 0.3 mile mark but the gradient plods on, holding steady between 6 and 8%. Once you’re around the curve, the fields’ terrain begins to rise on your right and drop away on your left and you begin the first sweeping right-hand bend. It’s here that you’ll get your first proper glimpse of Higger Tor, where your climb will conclude.

Before then, you have to find your way up what, I assume, is the ‘fiddler’s elbow’ that gives the road its name. Briefly touching 8.5%, this dent in an otherwise fairly straight line gifts you an absolutely fantastic view over the Hope Valley. You’re now over halfway (and fairly level with Callow Bank) so just keep plodding on towards the apex, which feels like it should be around the next bend or just up a little bit more but seems to never quite be there.

When you finally see the parking spaces, however, you’re pretty much there. It’s as good as flat for the last 0.2 miles until you reach the cattle grid and can take a breather. Of course, if you’re after some fun, just turn 180° and experience one of the area’s most enjoyable descents.